
Hive Radiator Valves New!!

What’s in the box?
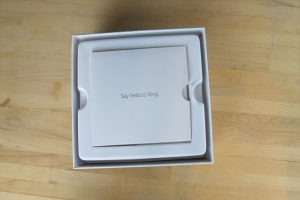
The ring doorbell packaging is well designed and functional. The whole process of opening the box and working through the layers is a bit like pass the parcel for adults. Each layer removed reveals more of the product options and the level to which ring have thought about this smart doorbell.
Instruction manuals
As usual with any modern electronic product, you are bombarded with warranty documents and manuals. The ring doorbell is no different. The instructions and install guide are of a high quality. Step by step instructions with pictures guide you through the install of the ring doorbell. These are clear and well thought out. The set up guide for the ring doorbell is also well thought out. From first power up to the activation through the mobile app are clear examples. Also in the manual section is a ring sticker for attaching to your window. Allowing you to show off your ring doorbell to your neighbours or ward off any burglars. Finally there is the mounting plate you attached to the wall, and then attach the ring doorbell
Ring doorbell and chime
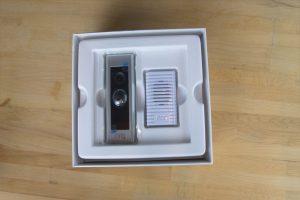
The next layer reveals the product itself. With its sliver cover on the ring Video door pro looks a very complete and well-designed product. The back of the product shows the two screws where you will need to attach the wires in order to power the ring doorbell. Next to the ring doorbell you will see the chime. You will need to use this if you don’t have an existing chime or actually want to hear the ring doorbell in a different part of your home. At first glance of the rear of the chime you will wonder how it’s actually powered, Ring have you covered don’t worry. In the hardware blue box in the next layer, plugs for multiple countries are included.
Install hardware
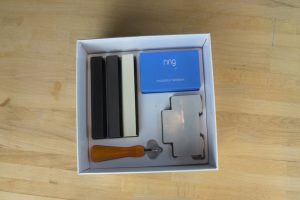
Ring doorbells are known for their high quality installation kits and the ring video doorbell pro is no different. They have included everything you could possible need to install this device. There is a screwdriver with a two-ended bit. Philips at one end of the screws and the other has a star key for attaching the faceplates, after you have set up the ring doorbell. Underneath the ring doorbells screwdriver you will find a mason drill bit to drill the holes for the mounting plate.
There are also three different mounting plates, Black, brown and a cream one. These are extra to the silver one already attached the ring doorbell. The most important part of the kit is the dual circuit breaker/transformer, which you will need to install to protect the ring doorbell and provide it with the 24 volts it requires to work. If your breaker box doesn’t have space for it, you may need to buy a small dual breaker box just for this item.
Inside the blue small box you will find the plug adapters for the chime and also the bypass part for an existing doorbell. There is also a resistor and the screws / wall plugs.
Installation
As there was no existing doorbell in the property where we installed this we had to install the wires and transformer separately. First we used the power off a light switch located near the entry door. (Make sure the power is off and isolated correctly) We worked the wire behind the plasterboard up to the ceiling. This was done so the mcb box with the circuit breaker/transformer for the ring doorbell was out of sight. The transformer shows the 230v side and the 24 v output side clearly. The wire from the light switch was attached to the 230v side and another wire attached to the 24v side. This was routed back down the wall to the area where the ring doorbell will be located.
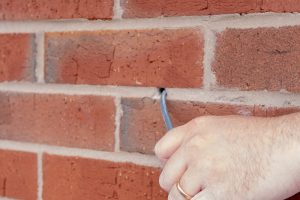
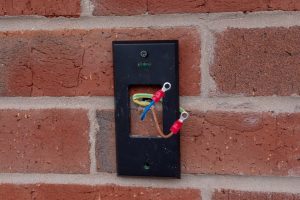
Next you will need to drill a hole through the wall for the cable from the 24v side to route into the ring doorbell. Route the cable through this hole. The mounting plate for the ring doorbell will need to be mounted to the wall. Place the mounting plate for the ring doorbell on the wall and mark where the two holes are. Make sure the cable already routed through the wall is in the middle of this plate. Using the provided drill bit next drill two holes where you marked them. Insert the wall plugs into the wall and using the provided screws mount the morning plate. The wire end will next need to be prepared. Stripe back the wire and attach eyelet clips to the live and neutral wires.(these aren’t provided but make the next stage much easier) loosen the two screws on the back of the ring doorbell. Attach the eyelet clips to the screws on the back and tighten.
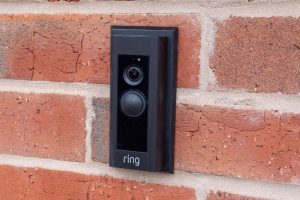
Now you need to attach the ring doorbell to the mounting plate. Once it’s attached and you are happy it’s time to reconnect the power and power up the ring doorbell.
First time set up
Once the ring doorbell powers up it will show a white light on the front flashing in a circle. This shows it’s ready for pairing. Download the ring app and create an account. Now you need to press the side of the ring doorbell to start the step up. Once you have done this it will ask you to connect to the door bell via its Wi-Fi. On your phone go to the Wi-Fi search and choose the info network with Ring at the front. After a successful connection to the ring doorbell, you next need to tell the ring doorbell your own Wi-Fi network name and password. In the app it will display all the local Wi-Fi networks it can detect. Choose your home Wi-Fi and enter the password. The ring doorbell will now finish setting itself up.
Next you will want to add the chime in the box. On the main dashboard within the app you will see the ring video doorbell pro and the option to set up a new device. Click this and you will next see a list of options to choose from. Choose chimes then the ring chime. At this point plug in the chime itself and the app will search for the device. Follow the instructions to install the chime. With the chime setup, your ring doorbell will be ready to use.
App Features
From the app you can set the ring doorbell up as you need. You can change what alerts you will be notified for. Motion and doorbell pushes. You can change the noises triggered for each of the options, through both your phone and the chime.
The motion alerts can be customised by a schedule and also by setting an area from the cameras viewpoint to monitor. Focusing on certain areas will greatly reduce the number of alerts the ring doorbell triggers on your phone or chime.
The event history page displays all the alerts you have set the app to track. 60 days it will store these events for if you have the subscription plan. One being device works out at £3 a month or $3 a month. When you first set up the app you get access to the cloud storage for thirty days. After using it myself for the thirty days I really liked the cloud storage and being able to look through all the motions alerts that happen or I’ve missed.
Summary
The ring video doorbell pro is a well build smart doorbell that greatly improves your home security. The app works great and the ring alerts trigger within a second of button push (most likely due to fiber internet connection) The installation is pretty straight forward with an existing doorbell but a new install like we did, is more time consuming and it is recommend that you get a professional electrician to install it for you. The image quality is of a high standard during the daytime and the night vision works great at night too. One area ring could improve is the audio when you speak to people at the door and audio back to the mobile device. Sometimes it can sound like the sound is broken. It may just an app issue. It hasn’t happened in a while so it may have sorted itself.
-DISCLAIMER- Digital Connoisseur is an Amazon Associate. As an affiliate I may earn a small commission for the review, recommendation, testimonial, and/or link to any products or services from this video (at no extra cost to you).